How to create an in person interview
Jan 1st 2021
How To Create An In Person Interview And Manually Set Availability

Step 1:
Login to your account.
Step 2:
Click on New Interview from the left menu:
Step 3:
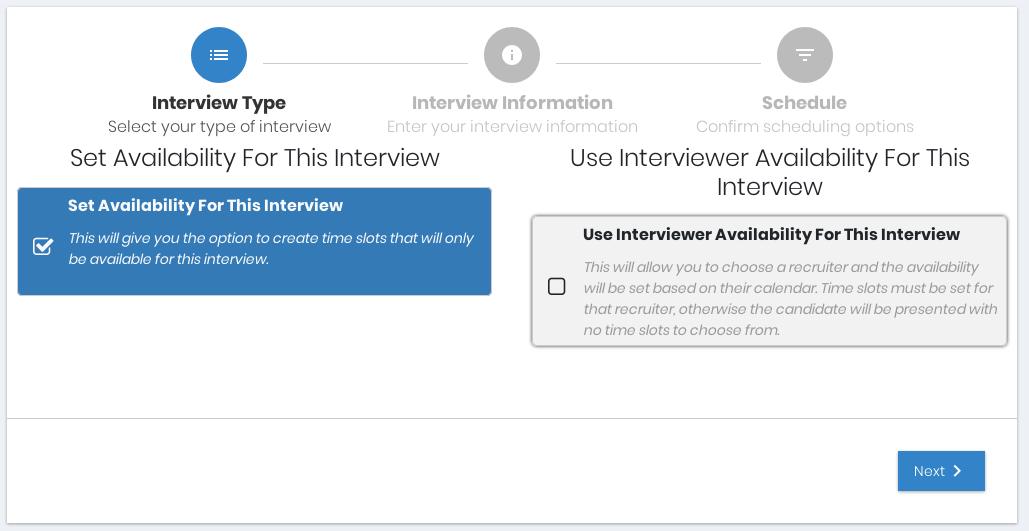
For this example we are going to set availability for this interview using the Interviewer Assistant calendar.
We are going to have the interview in person for this example. Please choose the "Set Availability For This Interview" selection:
Step 4:
General Information for the interview will be specified on this page:
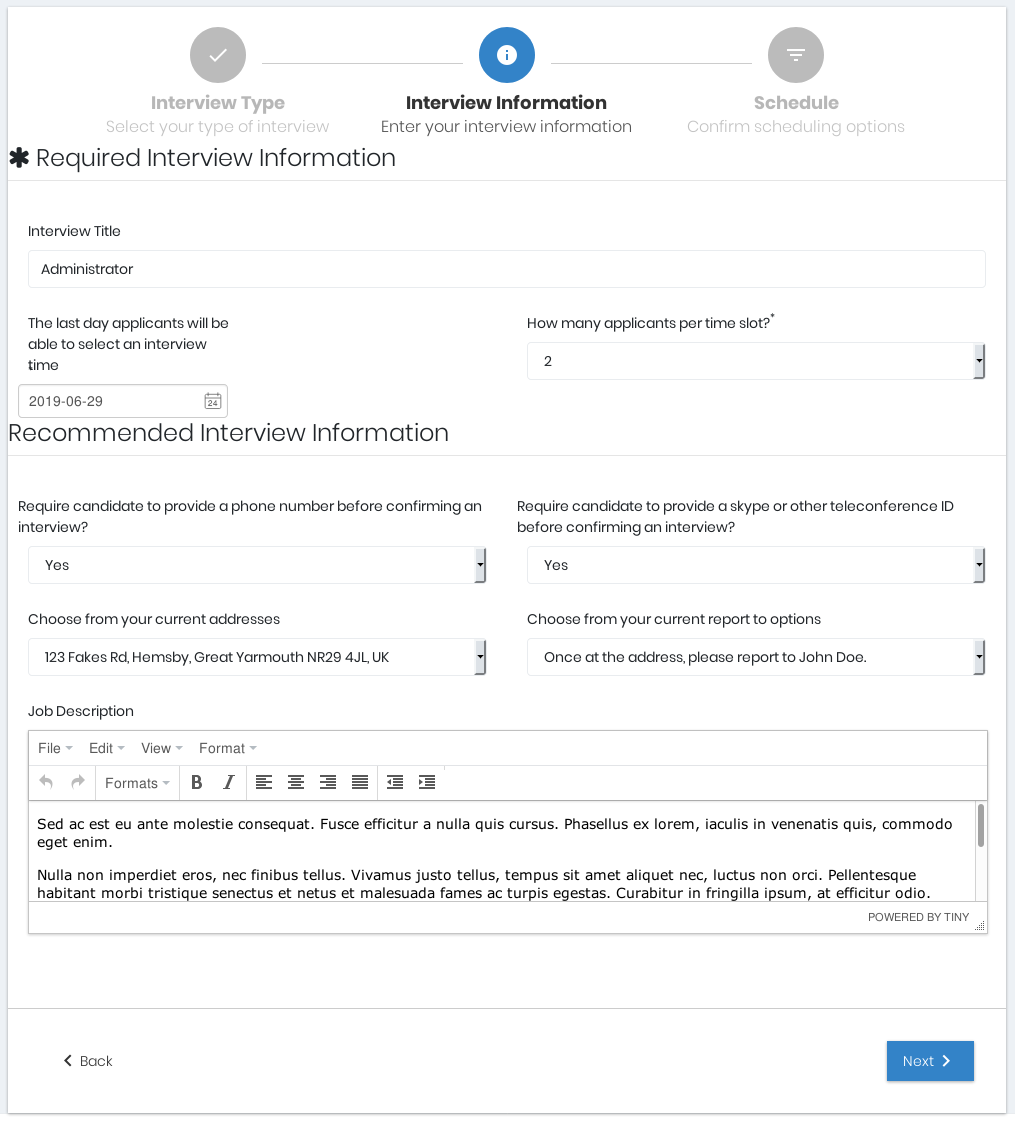
There are two sections for this page:
- Requred Interview Information, and
- Recommended Interview Information.
Required Interview Information:
- Enter a title for the interview;
- specify the last day you would like the candidates to be able to schedule or modify their interview time;
- How many interviewees you wish to invite for a time spot:
- You may have a reason to invite more than one candidate per time slot. Interviewer Assistant provides this flexibility. Specify the maximum number of candidates you wish to book per interview per time slot.
Recommended Interview Information
Optional data for the interview can be specified here.
These options will generate notifications to the recruiter for each situation specified on this page.
- The recruiter can specify if the interviewee needs to provide a Phone Number, and a Skype or other teleconference ID;
- specify the address the interview will take place and who the candidate should report to when they arrive at that address;
- a job description can also be entered in the open text field at the bottom of this page.
Click the 'Next' button at the bottom right of the page to proceed.
Step 5:
Set up the Interview Scheduling
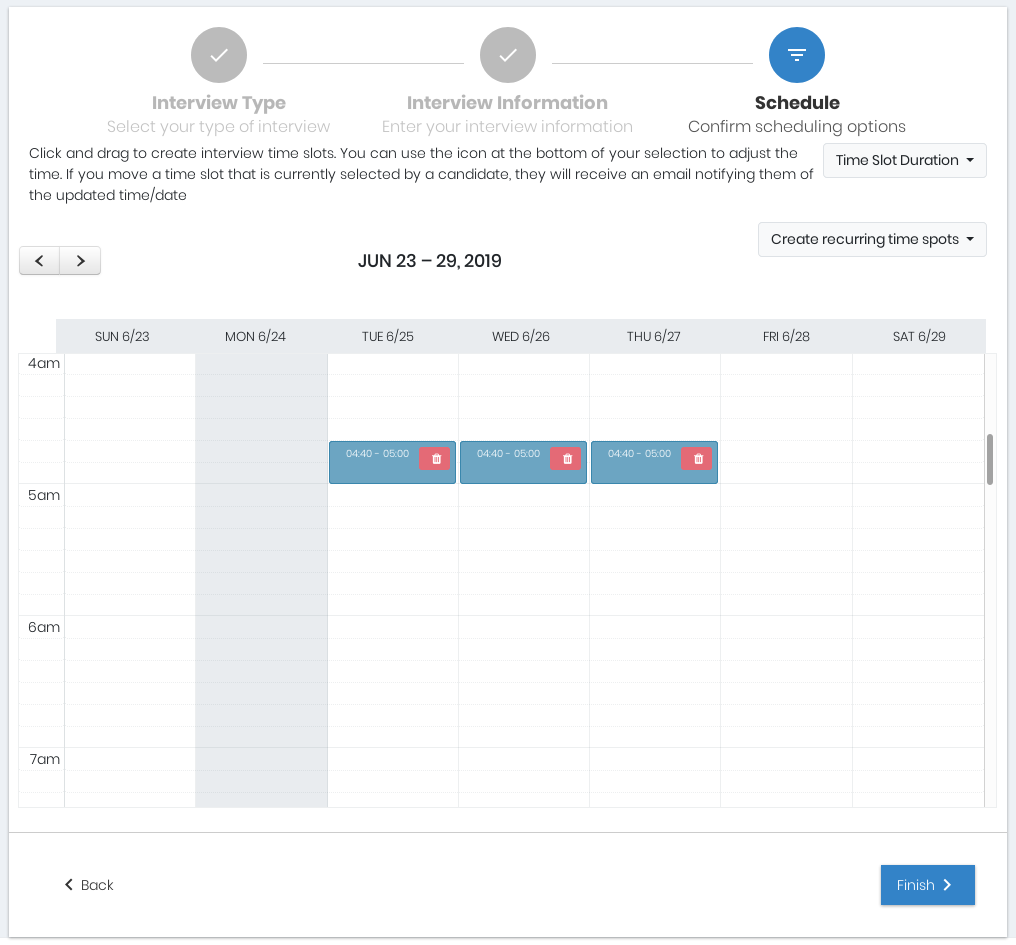
Interview availability is where the recruiter will manually enter the available times a candidate can select. The calendar allows you to point-click-drag to indicate what interview dates and times will be available for candidates to select.
To modify a time slot, click and drag the time slot, and/or stretch the time slot from the edges of the time slot.
To delete a time slot, click the trashcan to delete the time entry.
Once all time slots are created click complete at the top right of the page to finish the creation process.
Step 6:
Once the Interview creation process is done, click on the Finish button on the bottom right of the page.
Step 7:
Once completed, an Interview Summary page will load:
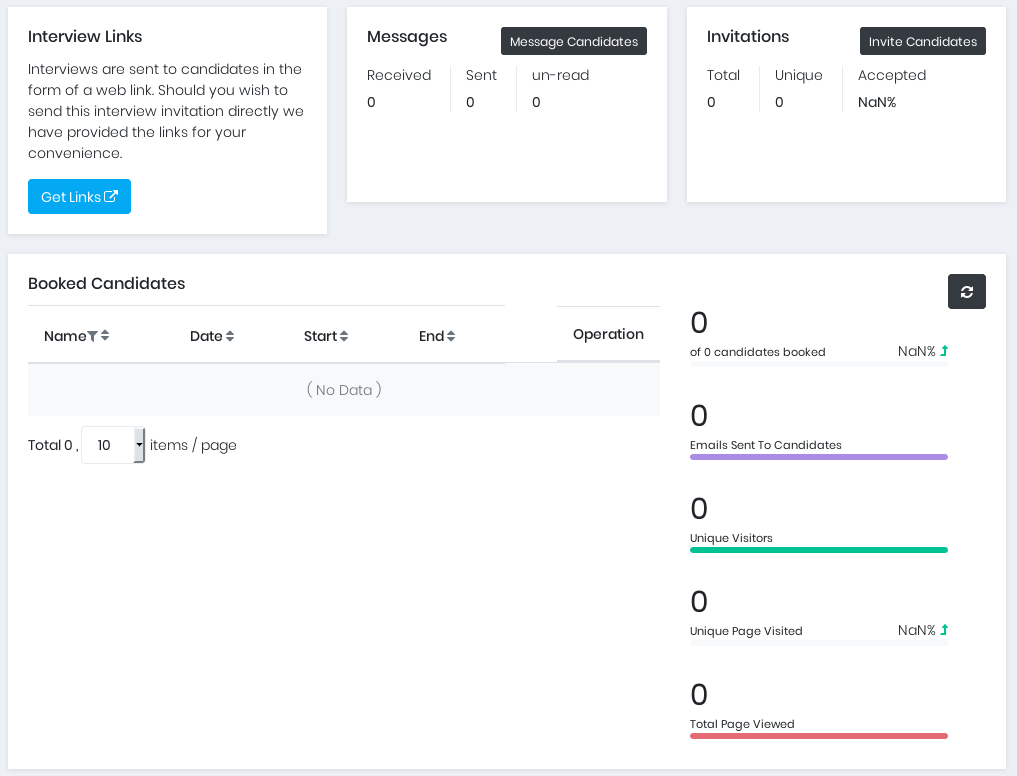
On this page, quick links provide easy access to some useful information on the newly created Interview, as well as functional links you can copy and paste in your communication method of choice.
On this page, you can also can choose to Invite Candidates, Customize your confirmation message or got the Dashboard for the competition you just created. Clicking the close button will also bring you to the dashboard for competition you just created.